HP Printers Ink Cartridge Error

How to Solve Ink Cartridge Errors in HP Printers

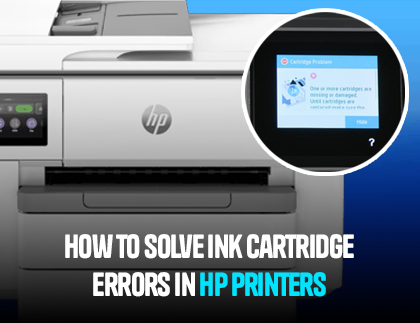
It may be extremely bothersome to have to handle ink cartridge issues on your HP printer, especially if you’re in the middle of an important document that has to be printed. Regardless of whether you see notifications such as “Cartridge Problem,” “Incompatible Cartridge,” or “Cartridge Not Detected,” these problems are widespread but totally fixable with an appropriate approach. With the aid of these thorough guidelines, you can identify the underlying cause of the issue and put practical fixes in place, restoring your printer’s functionality and allowing you to continue working uninterrupted. 

Common Reasons For Ink Cartridge Errors in HP Printers

If you have an ink cartridge error in your HP printers. It would be because of one of the reasons listed below

  1. Incorrect Installation: When the installation of the cartridges is not done properly or the cartridges are misaligned during the process, cartridge error happens
  1. Dirty Contacts: When the printer has been kept open without cover for long, dust can get inside the contacts. Dust or ink residue on the contacts of the cartridge can interfere with the communication process.
  1. Outdated Firmware: Printer firmware needs to be updated. When you install new cartridges, the outdated printer firmware might not recognize new cartridge models.
  1. Third-party Cartridges: HP printers work best with original HP ink cartridges. Using non-HP cartridges can sometimes result in compatibility issues.
  1. Empty or Expired Cartridges: HP printers have sensors to detect low ink levels or expired cartridges.
  1. Damaged Cartridges: The ink cartridges might have some physical damage which prevents them from functioning appropriately.

Step-by-Step Solutions to Fix Ink Cartridge Errors

  1.  Check Cartridge Compatibility

Before installing the ink cartridges on your HP printer, ensure that the cartridges are compatible with the model of the printer you are using. To check the compatibility, you can refer to the manual that comes along with the printer or you can also check for it on the official website of HP. If you are using a cartridge made by a third-party company, make sure that the brand is trusted and compatible with HP printers.

  1.  Reinstall the Cartridge Correctly

Follow the steps below to install the cartridges correctly

  1. Press the power button on your printer to turn it off. To be more sure, unplug the printer from the wall socket.
  2. Open the cartridge access door of the printer 
  3. Remove each of the cartridges one by one.
  4. If there are protective tapes present on the cartridges, remove them.
  5. Reinsert the cartridges into their respective slots
  6. Close the access door 
  7. Plug the power cable back and turn on the printer

    3.     Clean the Cartridge Contacts

Dust or ink residue can block proper communication between the cartridge and the printer. Here’s how to clean them:

  1. Turn off the printer and unplug it from the power supply
  2. Remove the ink cartridges 
  3. Locate the metal contacts on the cartridges and in the printer 
  4. Using a cloth slightly dampened with cleaning alcohol, clean the contacts of the ink cartridges and the printer.
  5. Let the contacts dry completely and then reinstall the cartridges.

4. Update Printer Firmware

Sometimes the problem is not the hardware but the software. If the firmware of the printer is outdated, it won’t be able to recognize the new ink cartridges. Follow the steps below to update the printer firmware 

Outdated firmware can prevent your printer from recognizing cartridges.

  1. Open Google Chrome and navigate to the official website of the HP printer 
  2. Look for the support section on the website 
  3. Search for the model no of your printer 
  4. Select your printer and then click on the drivers and software 
  5. In the next step, click on “HP printer firmware” to download the appropriate firmware
  6. Follow the on-screen instructions provided by the installer to update the printer firmware 
  7. Visit the HP Support website and download the latest firmware update for your printer model.

.

5.  Bypass the Cartridge Error

If you have tried all of the above steps and still ink cartridge error on the HP printer occurs. The problem could just be a glitch. If this happens then you can clear the error by bypassing it. Follow the steps below to bypass the ink cartridge error.

  1. Turn on the printer 
  2. Press and hold the Resume or Cancel button for 10 seconds
  3. The green light will start blinking and the error will be fixed 

By following all of the steps explained above, you can easily fix the ink cartridge error on HP printers. If you are not able to fix the ink cartridge error after trying all the steps, you can get in touch with us. Our printer support executives will get in touch with you to help you out with the issue.

Leave a Reply

Your email address will not be published. Required fields are marked *